Showing posts with label Crafts. Show all posts

Tuesday, 25 November 2025

24 Little surprises - DIY Advent Calendars!

Every year around this time I get a little excited when the shops start filling up with advent calendars. You know the ones: full of chocolate, gin, beauty products or random trinkets that make you go Ooh, I need that even though you absolutely don’t but there’s something extra fun about making your own advent calendar. It’s more personal, a bit creative and you can fill it with exactly what you like.

Here are a bunch of DIY advent calendar ideas that look great, don’t require a fine arts degree and most importantly won’t make your living room look like Santa’s workshop exploded!

The envelope string calendar!

envelope string calendar

This one’s simple, tidy and looks so cool. You just need 24 envelopes, some string or twine and a few mini pegs. You can use plain brown envelopes for that minimalist look or go for coloured ones if you’re feeling festive. Write numbers 1 - 24 on the envelopes, black marker does the job and string them up on your wall or across a window. Inside each envelope pop a little treat: chocolate coins, notes, stickers or small gifts. If you want to make it feel more thoughtful, you could include daily challenges like watch a Christmas film tonight or call a friend for a catch up. It’s a nice way to make December feel more meaningful rather than just counting down to stuffing your face with mince pies.

Mason jar magic!

Mason jar advent calendar

If you’ve got a few spare jars lying around, this is such a cute way to make a reusable advent calendar. Line up 24 mini jars and fill them with small surprises: sweets, rolled-up notes, bits of jewellery or even mini candles. You can decorate the lids with bits of fabric or paper and stick numbered labels on top. Arrange them on a shelf or tray or if you’re really feeling crafty glue them to a wooden board in the shape of a Christmas tree. It looks surprisingly stylish once it’s done and you can reuse the jars every year.

The self care calendar!

The self care advent calendar

December can be a bit of a mad rush so why not make an advent calendar that’s all about slowing down and treating yourself a bit! Instead of chocolates or gifts fill it with tiny self care ideas or little pamper treats including: A tea bag for a quiet cuppa break, a mini bath bomb, a face mask sachet, a handwritten permission slip to do nothing for an hour or a candle tealight for an evening soak. You can wrap each thing up in brown paper and tie with twine for that rustic, organised look. It’s basically a little reminder every day that you deserve five minutes to just breathe which is a gift in itself.

The for someone else calendar!

The advent calendar for someone else

Instead of treats for yourself make an advent calendar focused on giving. Each envelope or box could include a small act of kindness like: donate a tin to the food bank, message someone and tell them why you appreciate them or bake something for a neighbour. It’s wholesome without being soppy and it’s a lovely thing to do if you want to get into the spirit of Christmas without the sugar rush. You could even get the whole family involved and make it a group challenge.

The hobby calendar!

A hobby advent calendar

This is one of my favourites because you can tailor it to whatever you’re into. If you love cooking you could do a spice of the day calendar with 24 mini pots or packets of different herbs and spices. If you’re more of a cocktail person fill small bottles with different mixers, syrups or recipes to try. If you’re a gardener do one with seed packets and small gardening tools. Into crafts you can pop in washi tapes, buttons mini cross stitch sets. It’s practical, but still feels like a treat.

Making your own advent calendar might sound like one of those Pinterest ideas that’s doomed to fail but it’s actually easier than it looks. So grab your envelopes, jars or boxes and maybe a mug of hot chocolate and get crafting!

Do you have an advent calendar in December?

Thursday, 16 October 2025

Simple ways to bring nature indoors this Autumn!

Autumn is a wonderful season, warmer days left over from summer, crisp mornings, the golden light in the afternoon and the satisfying crunch of leaves on the ground. Sometimes it's good to bring a bit of the Autumn magic indoors. You don’t have to be a professional florist, great at DIY or own a country cottage to make your home feel like autumn. Here are some simple ideas.

Foliage finds!

Foliage finds

Starting with the obvious: foliage. You know those branches of colourful leaves you see in every autumn Pinterest photo? They’re basically free decor. Go for a walk and look for branches with yellow, red, and orange leaves. Snip or pick up a few (ethically of course, no stripping your neighbour’s trees) and pop them in a vase. If you don’t have a vase, even an old jar or a jug works. If you want them to last longer, you can lightly spray them with hairspray to keep the leaves from curling too quickly.

Foraged flower arrangements!

If you’re lucky enough to live somewhere with wildflowers still clinging on into autumn, grab a few! Things like dried grasses, seed pods or even weeds can look stunning once they’re in a nice arrangement. Mix them with your colourful leaves for a natural look. The great thing about dried flowers and grasses is they last forever, so you can keep them up through the whole season and beyond.

Pinecones!

Pinecones

Pinecones are autumn’s answer to baubles and they’re everywhere. They look great piled in a bowl, scattered along a mantle or added to a basket. If you want to get a bit crafty but still keep it simple you can. Dust them lightly with white paint or spray for a frosted effect. Tie a bit of twine or ribbon around the top for hanging. Add a drop of cinnamon or clove essential oil so they smell amazing.

Bowls of autumn goodness!

Sometimes it’s not about arranging things perfectly it’s about embracing the abundance. Get yourself a big bowl or basket and fill it with: Mini pumpkins or squashes, pinecones, conkers (horse chestnuts), dried orange slices and cinnamon sticks. You don’t have to overthink it just toss them in and give it a fluff.

Autumn garlands!

Autumn garlands

A garland is one of the easiest ways to add seasonal charm to a room. You can buy them of course but making one yourself is simple. Thread some string through dried leaves or tie on pinecones, dried fruit slices and little bunches of herbs like rosemary. Hang it across your mantle, doorway, or even along your shelves.

Scent matters too!

Nature isn’t just about what you see it’s what you smell too. That crisp air and earthy leaf scent might not be possible to bottle but you can get close with a simmer pot! Fill a saucepan with water, add orange slices, a cinnamon stick, cloves and maybe a sprig of rosemary. Let it simmer gently on the hob, topping up with water as needed. Your whole house will smell like a hug.

Before you go running out with a big basket remember to be respectful. Don’t take plants from protected areas, avoid picking anything in huge quantities and always check for bugs before bringing it indoors. Also be mindful of what might be toxic if you have pets or small children things like berries and conkers can be dangerous if eaten so display them somewhere out of reach.

Next time you head out for a stroll take a bag with you. Grab a branch of leaves here, a pinecone there and maybe a few conkers if you spot them. 

Wednesday, 24 April 2024

Crafty ideas to upcycle old baby clothes!

 Nearly all parents will have a box or two of keepsakes of when their child was a baby. Often it seems a shame to store them in a box where no one is going to see them. I know I do! We have at least 4 big plastic boxes of things from where the kids were little. The outfit they wore when they left the hospital, first shoes, party dresses and favourite blankets.

These items hold some of the fondest memories in our lives. There are so many ways to breathe new life into baby clothes and blankets. Whether you pick something from this list or experiment with a different craft.

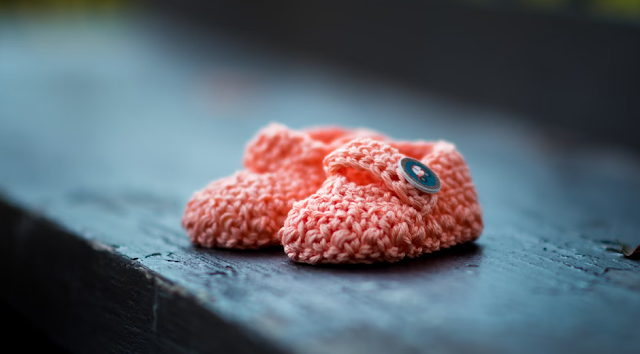
pair of baby's pink knit shoes on bench

Here are some different ways to upcycle or get crafty with old things that will help you to remember past times and give them a new place in your future.

A memory bear.
Reusing all those clothes that your child seems to outgrow quickly is a terrific idea. Although sewing a stuffed bear might seem challenging, there are plenty of free, easy to follow patterns available online. You'll have a sweet little teddy bear to treasure for years to come once you're done. You can either give it away as a keepsake, display it as a memory bear, or wait to give it to your grandchildren.

Memory book.
For a project that doesn’t require sewing, you could use old clothes and fabric to create and decorate a memory book or album. Use a large piece of fabric for the cover and fill the
pages with pieces of other items along with photographs of when your kids used to wear them. That way, when you look back and remember times past, you’ll have a piece of them
with you as well as a photo to look at.

Patchwork blankets.
Using a patchwork technique, you can create a new patchwork blanket by sewing square pieces of fabric from old blankets or clothes together. As you may use several items and each patch will tell a different story from when your children were babies, this is a great method to preserve memories. You could even embroider significant names or dates on each piece if you're good with a needle. After that you can pass your patchwork blanket on to other family members and future generations will be able to add their own patches to expand it.

Cushions.
A cushion made from pre loved baby clothes could make a great decorative piece for your bedroom or even a gift for grandparents. They’re simple to make, and you can do all sorts of shapes and sizes depending on what fabric you have on hand. Use the same patchwork method that you would use for creating the blanket. Or try following different tutorials for different patterns and styles.

Christmas decorations.
While Christmas is still a little way off yet, there’s no harm in getting prepared early with some handmade decorations.

Christmas is a time for the entire family to be together, share memories, carry out traditions and perhaps even start some new ones. Now is the ideal time to make cherished ornaments that you can display every year. If you're at a loss for ideas, there are lots of ways to decorate. Make patchwork stockings out of discarded garments, blankets, or muslins. Craft fabric ornaments shaped like snowmen, angels, penguins or polar bears. Your children will love receiving ornaments shaped like their first initials, since they will get to hang theirs on the tree every year.  

If you’ve got some old Christmas outfits taking up storage space, you could also try turning them into a memory ‘reindeer’ instead of a bear.

Repurpose as dolls clothes.
As children get a little older they might enjoy pretending to look after a doll as their “baby”. A really simple way to help them play out the fantasy and get more use out of old clothes is to repurpose them as outfits for the dolls. This can also work for stuffed animals.

Upcycle into new clothes and accessories.
Transforming pre loved clothes into new garments can be a fun and sustainable way to keep them for longer rather than throwing them away. You could add to existing clothes for example, covering pockets with bright patterned fabric can jazz up an otherwise plain pair of jeans. Or make new pockets for clothes, it will give your kids a place to keep all the things they collect when they’re out and about!

There are so many ways to breathe new life into baby clothes and blankets. Whether you pick something from this list or experiment with a different craft, I hope this has inspired
you to think twice before throwing items away or leaving them to gather dust.

Have you tried anything like this before?

Wednesday, 26 October 2022

Five fantastic Halloween Crafts.

I am taking part in Blogtober 2022 and will be writing posts with various themes/prompts throughout October. Today's prompt is: Autumn / Halloween crafts!

We love to decorate a little at Halloween. You can buy a whole host of decorations, there seems to be more and more on sale every year in the shops but it is also good to make some yourself to use year after year. 

Crafts from Baker Ross

Years ago we used to review a lot of craft kits from Baker Ross and we still have a lot of those Halloween decorations that we bring out each year. The kids cringe at their creations but they do make me smile remembering years gone by.

Here are some of the best Halloween crafts that I have seen from other bloggers!

Halloween Decoupage Letters!

Halloween Decoupage Letters

From Sticky Mud and Belly Laughs there are the Halloween Decoupage Letters! I think these are so simple to make and are easy peasy for a craft novice like me. I could just imagine these on the shelf in the living room. They're so pretty.

Toilet Paper Roll Frankenstein!

Toilet Paper Roll Frankenstein

Make your own model Frankenstein monster with this super simple cardboard toilet paper roll craft that is so much fun for kids to make at Halloween from In the Playroom. What a cutie this is and it's made from a simple toilet paper roll that we all have going spare! I know I can always go in our bathroom and find at least one.

Easy Halloween Rock Painting Ideas!

Easy Halloween Rock Painting Ideas

There is something about painted rocks which make me smile and they are so simple to make. The Inspiration Edit has a great guide on how to get started on painting rocks for Halloween. 

Halloween Felt Bunting!

Felt Bunting

The Homemade Halloween felt bunting from Jennifer's Little World is just adorable. I am a sucker for bunting and Halloween bunting is just the best. It looks a great way to use up scraps of felt and spare craft supplies that you have stashed away.

Creepy Halloween Jars - Upcycled Decorations!

Creepy Halloween Jars Upcycled Decorations

Making decorations from things that you have around your home is a good way to reuse and upcycle. These Creepy Halloween Jars from A Rose Tinted World use jars that could have just gone into the recycling. They are so pretty and really set the Halloween mood.

Have you been doing any Halloween crafts lately?

Thursday, 16 September 2021

(Ad - Gifted) Trying out Craftiosity! A craft subscription box.

Now that the kids are back at school I have a whole two days to myself and I have been trying to come up with things to occupy my time. There is only so much housework I can do. Recently I was sent a craft subscription box from Craftiosity to try out which gave me something to do for a couple of hours.

Craftiosity! A craft subscription box.
Craftiosity craft box

Each month a limited edition craft kit is sent out from Craftiosity. It could be macrame, ceramics, book binding or something completely different! Beautifully packaged, the box will arrive full of inspiration and all the materials, tools and instructions to make a complete project.

Each box contains:

A limited edition craft kit to make a complete project.
All the tools & materials you’ll need (you’ll just need household items like a pencil or ruler).
Clear step by step photo instructions
Online video tutorial.
A little something for your pinboard.
And regular surprises too!

The kit that I was sent was the Marbled Candle Holder Craft Kit. It really was beautifully packed and contained everything I needed including a wooden candle holder, a plastic tray which I didn't expect, white paint, a paintbrush, 2 marbling inks and disposable gloves (non-latex) which came in very handy.

Inside the Craftiosity box

For this project I was to be putting a marble design onto a modern candle holder. I have never tried marbling before but thought it was something which was a faff to do and very messy but it really wasn't.

There was a sheet with clear instructions on and if I got stuck I could watch a video tutorial. I didn't need to as the instructions were enough. I had to paint the candle holder, half fill the plastic tub with water and add drops of the marbling inks and then dip the candle holder in.

Painting the candle holder
Marbling
Candle holder

I was so impressed with the finished candle holder. It isn't perfect, I didn't managed to cover all of it but I like it. I actually thought I had done it wrong with big blocks of colour but on the instructions say big blocks are fine as well as smaller more detailed marbling.

This kit gave me the chance to try something I would never have thought of ever trying, it gave me a little boost and confidence to try new things. Everything included is of great quality and there is leftover paint which can and will be used for something else. I have looked back on the previous kits and there are so many that I would have loved to have tried, especially the Christmas themed one's.

You can subscribe easily to Craftiosity for £24.95 a month with free UK delivery and you can cancel your subscription at any time. You can also gift the boxes in a 1, 3, 6 or 12 month subscription.


I was sent the Craftiosity subscription box free of charge in exchange for this blog post.

Sunday, 31 January 2021

A finished school project. #MySundayPhoto

During the week Ellie's school arranged a screen free day and had them doing all sorts of things. It was a nice change.

For her Design and Technology project she has been creating a festival and the theme is "Covid is Over". It feels a lot like wishful thinking at the moment but she's really working hard on it. This weeks task was to make a stage where her acts would perform. She spent hours on it and had fun doing it. It was all her own work apart from Stu helping to cut the box and I printed some things out for her to cut out. She did all the painting, cutting out, gluing, sticking and even created a band using Lego figures.

My girls project. A stage.

My Sunday Photo linky

Wednesday, 26 August 2020

(Ad - Gifted) Rainy day colouring & back to school supplies from STABILO!

The weather has not been great, where has the summer gone? which means I have started to hear "I'm bored" more and more. Over the weekend Ellie was at a loose end but thankfully we had been sent a little package of STABILO colouring pens and pencils to try out and I printed off some colouring sheets to give Ellie something to do.


STABILO is a brand which has been around for nearly 100 years. I remember using their products as a child and I remember thinking that people who had the classic STABILO highlighter pens were so fancy. hehehe Over the years my girls have used their pens and pencils but the sets we were sent to try were new to us.


STABILO woody 3 in 1 is multi talented as it combines a colouring pencil, watercolour and wax crayon all in one. With its high opacity and colour intensity even on dark paper it is a favourite for every child. Its XXL lead is perfect for large areas and suited for children's hands as the chunky pencil allows a good grip. 

The STABILO woody 3 in 1 is water soluble and perfect for decorating windows, cups or any smooth surfaces. Don't worry it is easy to remove with a damp cloth.


 We think these are fantastic. So much more than just a colouring pencil. Dip them in water and they become a watercolour but without all the mess of getting the paints out. I love that it comes with a sharpener as we would have struggled to sharpen these with the small one's we have. These are a lot of fun and at the moment I have about 30 pictures which Ellie has drawn with them. She really does like them.


The STABILO Trio DECO fibre-tip metallic pens makes drawing and colouring truly exciting. The sparkling metallic colours brings works of art to life and are available in 8 colours. Ergonomic triangular grip zone makes the product suitable for children encouraging them to hold the pen with the dynamic tripod grip and are also CE-certified. 

The metallic fibre-tip pens are perfect for colouring and are also great for do it yourself projects. The pens create magical glitter effects on paper, cardboard, wood and other absorbent surfaces. Great for decorating gifts and designing cards, letters and photo albums.

Ellie loves anything shiny and sparkly so she saw these and instantly fell in love with them. These are something special and has said she won't use them for every day colouring and will keep them for special occasions. 


STABILO Cappi is a unique felt tip pen with a cap ring to thread the caps together so it's almost impossible to lose them! Plus the pen can be left uncapped for up to 24 hours without drying out and has washable ink. Its ergonomic grip zone is ideally designed for children's hands and is perfect for finding the right grip while colouring. It's also good for learning to write in the early stages. The unique tube design prevents the pens from rolling off the table too.


We think these are just genius! I have lost count of the times the kids have lost the lids of pens and they have dried up but with these the chances of that happening are very slim. Ellie thought these pens were lovely to colour in with and loved the colours in the set.

Ellie has said that she can't wait to take these to school. We already know that at Ellie's school they have to take in everything they could possibly need as there will be no sharing of equipment so these will come in very handy and with the cap ring there should be no lost pens.

You can buy STABILO pens, pencils and supplies from most places which sell stationery.

We were sent these STABILO free of charge in exchange for this blog post.

Wednesday, 22 April 2020

Fruit Bowl Has Launched a Friends and Family Facebook Group!

It is hard to keep kids amused at the best of times but now they are spending more time at home I know I am running out of ideas fast but the UK based children’s snacks and treats company Fruit Bowl have launched their Fruit Bowl Friends and Family Facebook group to inspire parents and families with fun tasks to keep little hands busy at home.


They are sharing crafts, activities, recipes and resources each day and hope to support parents during this tough time. Anyone is welcome to join the public group, with parents encouraged to share tips on keeping little ones busy. I think it is such a fantastic idea.

The Jungle Frog Trumpet craft is a taster of what they are sharing!
You will need:
Paper Cup
Colourful Paints
Large Pom Poms
Googly Eyes
Thin Foam or Card
Birthday Party Trumpet

Instructions.
1. Paint the outside of the paper cup a bright colour, leaving the rim to be painted red. Leave to dry.
2. Cut two arms and legs from the foam or card.
3. Once the cup is dry, very carefully cut a cross the base of the cut.
4. Push the birthday party trumpet through the cut cross with the mouth end poking through the base.
5. Stick the arms and legs on the cup.
7. Stick the two pom poms onto the top of the cup.
8. Stick the googly eyes onto the pompoms.
9. Blow the horn!

Loved by families for 20 years, Fruit Bowl create everyday fruit snacks and yummy fruit treats many of which contribute towards your child’s 5 a day! If you are struggling to get to the supermarket at the moment or self-isolating Fruit Bowl products are also available for delivery via their online shop for stress free shopping!

Thursday, 12 March 2020

My first cross stitch pattern is finished and why you should try it.

In January I started a new hobby thanks to a cross stitch kit I was sent to review. Before I started I had never even tried doing cross stitch but it was so easy to get the hang of.


The kit I used was the Rico Hare Cushion Cross Stitch Kit from LoveCrafts I did think about using my finished cross stitch pattern as a cushion cover but I knew if I did the kids would not leave it alone and it would be ruined so I put it in a frame and it's not in the bathroom. I am planning on doing the same with my new kit. Over the weekend I bought a new kit. The Rico Fox cushion cross stitch kit and I have already made a start on it.

I have found so many reasons why I love doing cross stitch and why it's a great hobby:

It's easy to pick up!
It looks way more complicated than it is. Once you have made the first few stitches that's all you need to know! As long as you are able to follow a pattern there should be no stopping you. I watched a few videos on YouTube to get me started and I was shocked that there wasn't more to it since the end result looks so fancy.

It's relaxing!
You don't think about anything else apart from cross stitch when you are doing it because the only thing you focus on is counting and stitching which is very relaxing and certainly reduces your stress levels.

It's creative!
I am not usually a creative or artistic person so this is a great hobby. It makes me feel like I have a talent. You don't have to stick to patterns when you get the hang of it, you can design anything you want.

It takes a while!
There is nothing quick about cross stitch but that is a good thing. It took me a month to complete this project, doing half an hour here and there and I was actually quite sad when I was finished as I looked forward to doing it in my free time.

It's not expensive!
A biggish kit like I had costs about £20 but you can find free patterns online and buy the basic supplies separately and cheaply.

Projects can become gifts!
You can create inexpensive, hand made gifts for friends and family. I always prefer hand made gifts over bought one's.

A great sense of accomplishment!
When you finish a project it feels so good. I was so proud of myself when my rabbit was finished. My family are very impressed with it too.

Do you do any crafts like cross stitch?

I received the Rico Hare Cushion Cross Stitch Kit free of charge to review for a previous post but I was not asked to write this blog post.

Wednesday, 22 January 2020

(Ad - Gifted) Getting creative with LoveCrafts and learning to Cross Stitch!

January is a great time to start new projects or a new hobby. So when I was contacted and asked if I would like to try a new craft I thought why not. Crafts are great for self care, mindfulness and are perfect for taking time out from the busy parent life.

LoveCrafts is the home for all things crafting from knitting to stitching and even more. There are kits, patterns, supplies, tutorials, guides and lots of inspiration.

I decided to give cross stitching a go and was sent everything I needed in a kit. The one I chose was the Rico Hare Cushion Cross Stitch Kit.

The packaging of the cross stitch kit.
The rabbit cross stitch pattern and wool.

The cute Hare design cushion front kit comes complete with threads and counted cross stitch design. It seemed ideal for a beginner like me.

Cross stitch is simply making cross shaped stitches in an open weave fabric. I have seen and read about people doing it but I've never tried it myself, until now.

I opened the packaging and had a quick look at the instructions which were a little baffling, not because they were confusing but because I didn't have a clue what I was doing. I went straight back to the LoveCrafts website and found a tutorial. How to cross stitch: A beginners guide! It was just what I needed.

a cross stitch pattern. It's a rabbit

The hare pattern looked easy compared to what I have seen, the colours are simple and the pattern looks straight forward. I think this was a fantastic kit to get me started. 

I cracked on and set to work. I may have got a little carried away stitching the red triangles and went right across the top of the square material. Oops. I had to un-thread the majority of it and leave some spaces. I have noticed that I have gone a little bit wrong with the space I need to leave for the rabbits left ear but I am carrying on regardless. My first try at cross stitch was never going to be perfect but I feel good about.

my first few stitches of my cross stitch project

Doing crafts like this is so relaxing and I am really enjoying it. I can see me continuing to cross stitch after I have finished this project and I will of course be updating you on how I get on.


It's not something which will be finished overnight. The above photo shows where I am up to as of yesterday and that has taken me a week. It is starting to take shape and look like the pattern. I kept showing the kids and they weren't convinced but yesterday they could see the rabbit ear. Hooray! It is time consuming but I am fine with that. I am going to be so proud of myself when it's finished. Whenever I get a free half hour I am picking it up and carrying on. My fingers are like pin cushions but it's not putting me off. lol

LoveCrafts has a massive selection of cross stitch kits and I am already eyeing up my next challenge.

 I was sent the Rico Hare Cushion Cross Stitch Kit free of charge in exchange for this blog post.

Sunday, 11 August 2019

Crafting in the garage. #MySundaySnapshot

I love that my girls love doing arts and crafts but sometimes I really can't be bothered with the mess! I've solved that problem now. They can go in the garage. hehehe

Last week Ellie was out in the garden with a box of material and other crafty bits, it looked like rain and the wind was picking up. I suggested she went into the garage and she was happier than a pig in poop. She could make as much mess as she wanted and I didn't mind.


Monday, 22 July 2019

(Ad - Gifted) The BIC KIDS Young Artist Award is back!

For the 3rd year running the BIC KIDS Young Artist Award is back to encourage creativity in children across the country.

It is giving proud parents across the UK and Republic of Ireland the opportunity to see their child’s drawings graduate from the fridge door to billboards and it can also give the kids something to do for the first couple of weeks of the summer holidays.

BIC KIDS Young Artist Award logo

Open to all 5 to 11 year olds, entrants are encouraged to exercise their artistic flair, let their imaginations run wild and draw with complete freedom. 

To be eligible to enter, entries must:

Be from children aged 5-11 years old.
Be drawn on plain, landscape A4 paper.
Be drawn in pencil, felt tip and/or crayon.
Be the original work of the entrant, and not include any recognised characters or logos.
Be received by 11.59pm on Sunday, August 4th, 2019.
Be submitted to the BIC® KIDS website by the child’s parent or legal guardian.
Be the only entry of that child.

Judges will award points for everything from creativity and use of colour, to composition and subject matter. The expert judging panel will select 13 finalists to represent their region, with their work being displayed on their very own, local billboards from late August. A public vote will then decide the ultimate winner, whose drawing will go nationwide in late September. In addition to priceless public recognition of their work, the winner will receive BIC stationery goodies and a creative art party. 

If you need any new colouring products to help with your child’s entry, why not visit  Asda, WHSmith, Ryman or Amazon to stock up! 

A selection of BIC kids pens and pencils.

We were sent a selection and Ellie was overjoyed. It's a brand we all recognise and use. My two girls are a little too old to enter this competition (Ellie will be 12 by the time it's judged. Hmmf. hehehe) but if they were younger they would be joining in. Ellie is instead using these pens and pencils to get creative and draw plenty of pictures.

We were sent a selection of BIC products in exchange for this blog post.